As a chef, I know the magic of quick pickling and how much flavor, texture, acidity and color that pickled anything can bring to the plate. These quick Pickled Yellow Beans are a particular favorite. They’re vibrant yellow, not too tart, and have a great pickle flavor. Plus, they’re easy and keep in the fridge for a month. What’s not to love?

This post may contain affiliate link(s). As an Amazon Associate, I earn from qualifying purchases. See Disclosure.
Pickles are a culinary secret. I’m not talking about big, green dill pickles that are face-puckeringly sour, but rather well-balanced, artfully pickled veggies and fruits that lend color, texture, acidity and flavor to a meal.
The Backyard Table

Get it NOW and level up your outdoor dining! The Backyard Table - Recipes for Summer Cookouts features 34 of Chef Jenn's BEST recipes for outdoor eating and entertaining.
You'll get ad-free recipes like:
- Grilled Corn Guacamole
- Grilled French Onion Burgers
- Deviled Egg Pasta Salad
- Blueberry Grunt
- and so many more!
Every recipe is created, tested and loved by Chef Jenn and her family - there's no AI here!
Get it now, at a special introductory price of $7.99. That's over 50 pages of foodie love at your fingertips!
Buy Now!One summer, hubby brought me home a half bushel of yellow beans from the farmers market. Do you know how many beans are in a half bushel? A lot!! I started making yellow bean everything, including batches and batches of these Pickled Yellow Beans.
This Pickled Yellow Bean recipe was perfected that summer. It’s not too tart, has a nice dill and garlic flavor, and the best part is that they’re easy to make and keep in the fridge for weeks and weeks. Plus, there’s no fancy canning involved, so all you need is room for a jar (or two) in your fridge!

What You’ll Love About Pickled Yellow Beans
- They’re perfect as a snack, on a charcuterie board, or as a side dish.
- These pickles stay fresh and tasty in the fridge for up to a month.
- They’re healthy and homemade and a great way to enjoy the wholesome goodness of home-preserved food.
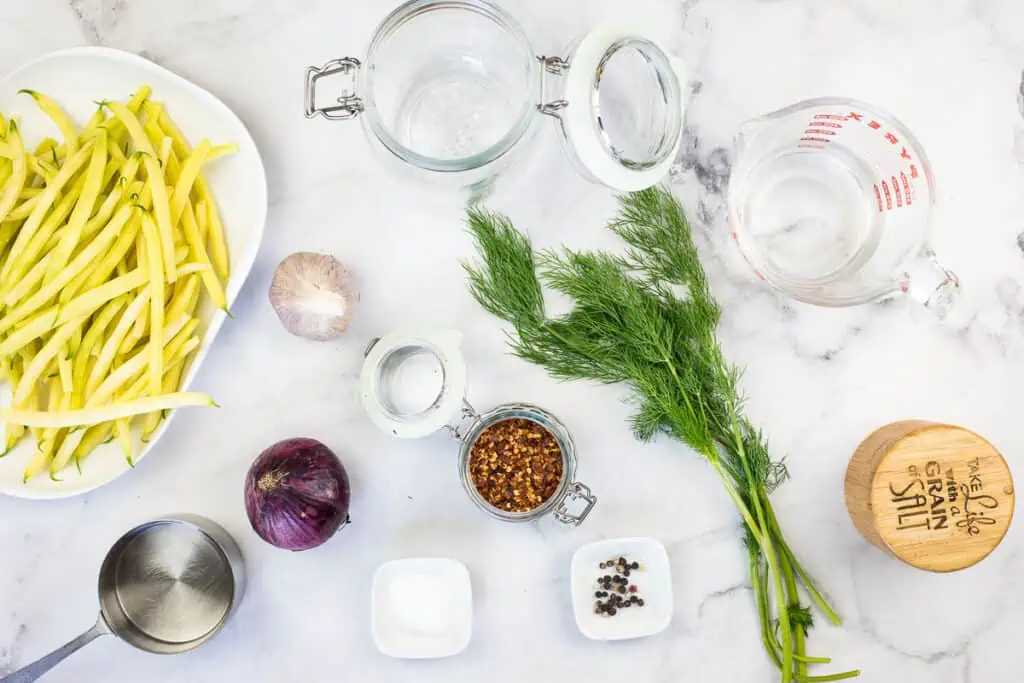
Ingredients
- Yellow beans – Fresh beans, not frozen. Snip off the stem end. You could also use green beans.
- White vinegar – Or apple cider vinegar.
- Water
- Granulated sugar – Just a wee bit to balance the vinegar.
- Garlic cloves – Whole cloves. Don’t forget to eat the cloves later; pickled garlic is amazing!
- Salt
- Fresh dill – You don’t need much, just 2-3 good-sized sprigs.
- Red onion – Sliced thinly. You could also use sweet onion.
- Black peppercorns
- Red pepper flakes

How to Make Pickled Yellow Beans
- Make the brine by combining the vinegar, water, sugar, salt, and garlic cloves in a small saucepan and heat to a boil. Stir until the sugar dissolves. Set this aside to cool.
- Wash the beans and remove the stem ends but leave the other tip on.
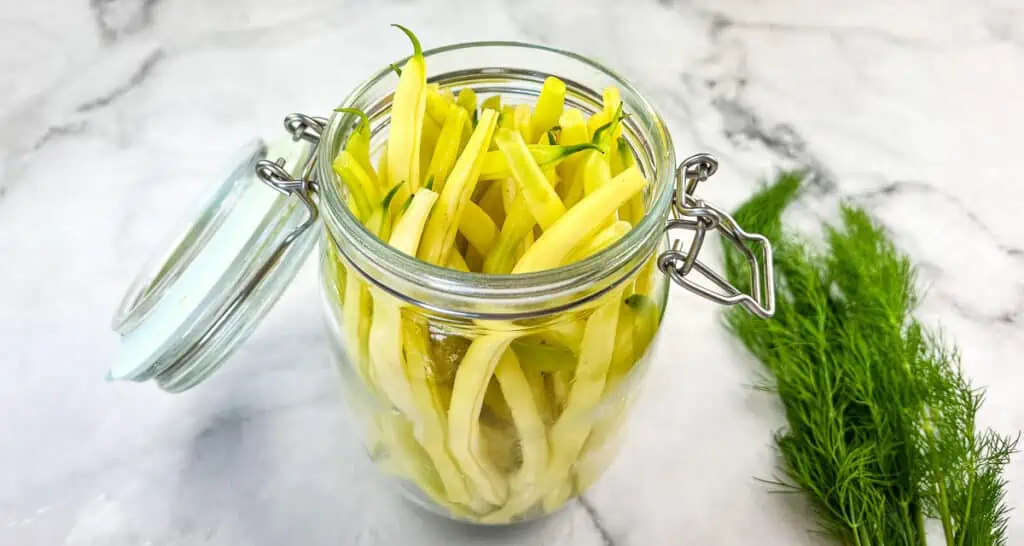
- Fill a 16-18 ounce mason jar with the raw yellow beans, arranging them so they are snug but not tightly packed. Trim the beans as necessary to close the lid securely.
- Trim the beans to fit into the jar with about 1/3-inch of headroom. Snack on the bits of unused beans.
- Blanch the beans for 2 minutes in rapidly boiling salted water, then remove and rinse under cold water until cool to the touch.
- Add the beans to the jar along with the peppercorns, sliced onions, fresh dill, and red pepper flakes.
- Pour the cooled brine into the jar, ensuring the beans are fully covered.
- Store in the fridge for at least 1-2 days until they’re properly pickled.
Step By Step Process


Chef Jenn’s Tips
- For the best flavor, let the beans pickle in the fridge for at least two days before tasting.
- The snug fit of beans in the jar helps them stay submerged in the brine.
- Adjust the amount of red pepper flakes based on your preference for spiciness.
Make It A Meal
These tangy and crisp pickled yellow beans can go with any meal. Serve them alongside anything grilled or smoked for a refreshing contrast to rich, smoky flavors. I love them with tacos. They’re also a fantastic addition to a charcuterie board, bringing a bright, pickled element that pairs wonderfully with cheeses and meats. For a simple yet satisfying snack, enjoy these pickles straight from the jar!
Storage
Storing these pickled yellow beans is a breeze. Keep them in the refrigerator, ensuring the lid is tightly sealed. They will maintain their flavor and crunch for up to a month. Unfortunately, these pickles are not suitable for freezing, as the freezing process can significantly alter their texture. However, with their long fridge life and delicious taste, it’s unlikely they’ll last that long!
Pickled Yellow Beans
Ingredients
- ½ – ¾ pounds yellow beans stem ends trimmed
- 1 cup vinegar white or apple cider vinegar
- 1 cup water
- 2 teaspoons sugar
- 2 cloves garlic peeled but left whole
- 1 teaspoon kosher salt
- 3 sprigs fresh dill
- red onion 1-2 slices
- black peppercorns a pinch
- red pepper flakes a pinch
Instructions
- Make the brine by combining the vinegar, water, sugar, salt, and garlic cloves in a small saucepan and heat to a boil. Stir until the sugar dissolves. Set this aside to cool.
- Wash the beans and remove the stem ends but leave the other tip on.
- Fill a 16-18 ounce mason jar with the yellow beans, arranging them so they are snug but not tightly packed. Trim the beans as necessary to close the lid securely.
- Trim the stem ends of the beans to fit into the jar with about 1/3-inch of headroom.
- Blanch the beans for 2 minutes in rapidly boiling salted water, then remove and rinse under cold water until cold to the touch.
- Add the beans to the jar along with the peppercorns, sliced onions, fresh dill, and red pepper flakes.
- Pour the cooled brine into the jar, ensuring the beans are fully covered.
- Store in the fridge for at least 1-2 days until they're properly pickled.
Notes
Chef Jenn’s Tips
- For the best flavor, let the beans pickle in the fridge for at least two days before eating.
- The snug fit of beans in the jar helps them stay submerged in the brine.
- Adjust the amount of red pepper flakes based on your preference for spiciness.
Nutrition
A Note on Nutritional Information
Nutritional information for this recipe is provided as a courtesy and is calculated based on available online ingredient information. It is only an approximate value. The accuracy of the nutritional information for any recipe on this site cannot be guaranteed.

